Viewing entries in
before and after

1 Comment

Wenatchee pet photography: Ali from the Wenatchee Valley Humane Society

We adopted a new baby this week. Ali (who was called Sable) and her sister had been abandoned by their previous owners when they moved and left the animals to fend for themselves. Whenever I write something like this a part of me hopes the offenders will see this and feel guilty. Shame on you. These are living, breathing animals that were suffering because you couldn't, at the very least, drop them off at the humane society. OK, off my soapbox. They were discovered when Ali got into a tangle with a porcupine and neighbors found and brought them in. We were wanting another dog and found Ali at the Wenatchee Valley Humane Society through their Petfinder page. Such a sweet girl. A little timid still, but totally understandable, I think. Yesterday, the first time she was left alone for an hour, she busted out our front window and escaped. She didn't go far, just stayed on our front lawn with the neighbor kids. Definitely has abandonment issues from her previous owners/treatment, but we will get through them.

I know pet ownership isn't for everyone, but please remember your local animal shelter when considering adoption and especially when deciding which organizations to help or donate to. They totally appreciate, and really, really NEED, donations of just about anything: time, money, pet food, blankets, pet toys, animal walkers. Even photography and graphic design services, I hope, as that's what I'm going to offer. And kids can help walk pets at our local shelter with a parent's supervision. My 10 year old wants to help so we'll be headed that way soon.

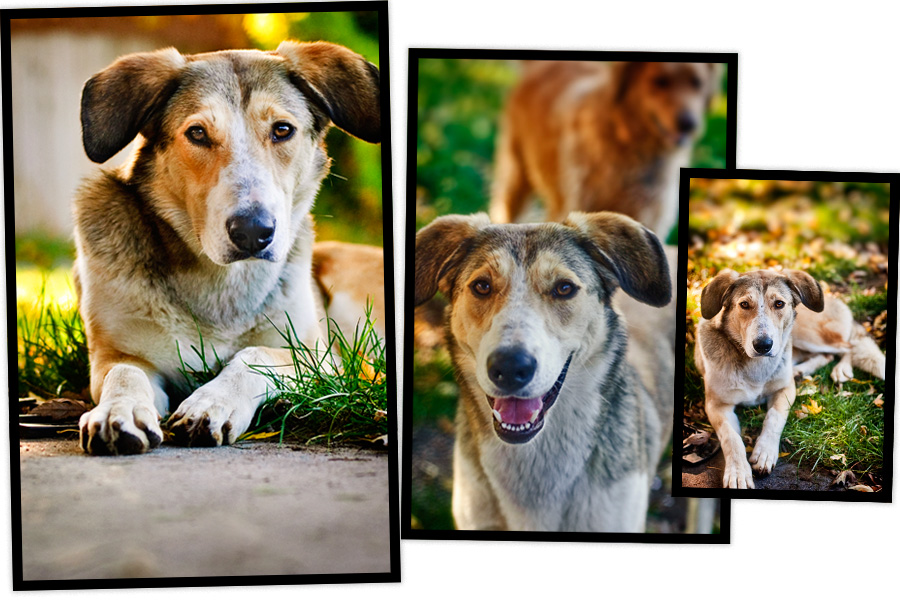
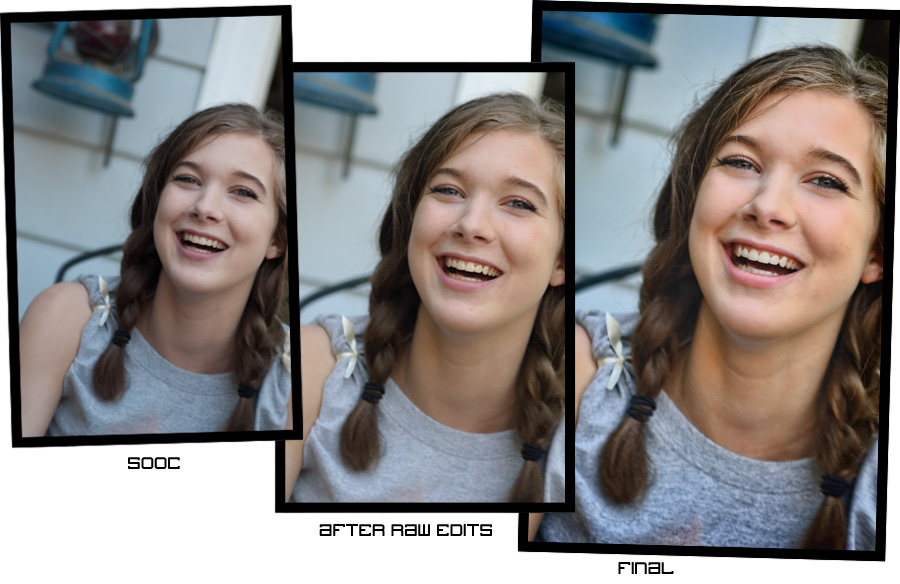
As far as photo post-processing I really just did basic adjustments to contrast and color saturation. Shows that just a little helps a lot. Here's a tip when photographing your pets: get down low, on their level. Makes a huge difference over the typical "shot from above" look of most home pet snaps. I like all three shots below, but notice how much stronger the first one is over the other two. The camera at her eye level creates a much more intimate, personable feel.

Happy Wednesday! My daughter has another WVC volleyball home game tonight and I'm so excited to watch them play. Sad there are only 2 more after this one though and then we'll have to wait till next season.

1 Comment

Comment

Before and after: Wenatchee portrait

I was shooting his big sister's senior portraits. He had a new haircut he did NOT like (too short!) We all tried to cajole him into a just a couple photos, but nope, no way, lady, no how. I resorted to snapping a few when he wasn't paying attention and when he'd see me he would laugh and try to run and cover. Going to give this one to his mom because I think it's the only one I got when, for a split second, he let me in.

Before and after info: Crop, straighten and basic exposure edits in Camera RAW, and the following actions: TRA Contrast + (Luma) at 20%, TRA Lux (Soft) at 30%, TRA Warm it up Kris at 70%, TRA Oh Snap! at 60%, Topaz Detail faded back to about 50% and then added a vignette.


Comment

1 Comment

Before and after: Portrait with point and shoot

My one and only blonde daughter decided to go brunette. I loved her blonde, I love her brunette and either way, wow, she is so beautiful! Is it appropriate to be jealous of your own kid?? Probably not. Anyway, this is a photo of my middle daughter taken with a cheap "point and shoot" camera. Nothing fancy, but, and here's the important part, it was HANDY. What's the best camera? The one with you, or the one you'll use. Ghetto lighting all the way (a lamp on the floor beside her, in an all white closet.) It gave a really nice "beauty-dish" look. "Beauty-dish" being a type of lighting used in the cosmetic industry to achieve that flat, shadowless, even light on a face close-up. Yes, a bit overexposed, but shot in auto, with a camera that was HANDY, it's a shot I love that I wouldn't have had otherwise. I did a bit of hilight recovery in LAB to bring back a bit of the skin and ran a few favorite TRA actions (+Contrast Luma and Lux-soft), as well as sharpened the eyes and lips (using the duplicate>overlay>high pass method). That finished the middle color image. I then tried a "greyscale-ish" version by running a TRA recipe (sorry but I couldn't find it online any longer. It ts Brooklyn and Get Faded Winter at 40%) and then adding back in some warmth. Love the different feel to each version!

1 Comment

1 Comment

Before and After: TRA "Dirty Pictures"

Today I got to play with a MUCH awaited new filter/action from Totally Rad Actions (my very favorite action company!) I'm already a big fan of adding texture to photos in post-process and this ingenious little filter makes it so much quicker. As eager as I was to get it, what sold me was the ability to also use your own textures from within the filter, just like the ones that come with it. Very forward thinking of the Boutwells, (the creators), to not limit you to just the provided textures. It was perfect timing as I wanted to post another Before and After.

We got new next door neighbors and they have 2 new puppies! I asked if I could take a few photos in exchange for prints and was welcomed into their backyard on an amazingly golden summer evening. This is Rudy, the pug pup. In this image, I burned in his fur a bit to bring out the detail and added some selective focus to emphasize Rudy. Also added a little more vibrance to bring out the color variation in the grey stone. With this photo, I actually "ended" with the middle image as my final. Then, after buying the Dirty Pictures filter, I reopened it and added the fabulous texture you see here. I liked it before, I love it now. Oh and concerning the texture. I really like adding a couple (or more) of the textures and lowering their opacity so they can really interact and be unique. One of the "textures" I used here is actually a portion of a shot from Yosemite park. I thought it brought back that warm evening color I remember from the night.

1 Comment

Comment

Before and After: candid portrait photography

It's still Wednesday, right? Or how about "it's ONLY Wednesday?" That's more like it, a slow week for sure.

For this before and after you can see the difference in this photo is mostly a little crop and rotate, some warming up and a boost to the contrast and sharpness. I was testing out a new plug-in by Topaz Labs called Detail and it claims to sharpen without halos. A pretty tall order but I think they've done a good job. The thing I have noticed with the Topaz plug-ins is it is really easy to go too far. I try to be selective in how I apply them and even in retrospect seeing my after image, I think it could be a bit softer in the hair, particularly on the top left of her part. I also softened the skin beforehand as one of the downfalls of sharpening is super textured skin, which you generally don't want. I didn't need to do much as her skin is pretty nice. I created a layer that was composed of just the red channel and did a surface blur. Added a bit of noise back in, changed the blending mode to soft light and lowered the opacity to taste. The Detail plug-in really helped her eyes pop, especially since she has the type of (smaller) eyes that close when she laughs or smiles -- which is one of the things that gives her that beautiful smile! I whitened her teeth a bit because few people have really white (movie star white) teeth and the extra warming made it worse. (I could have also masked out the teeth in the warming process, but like everything else in post-processing, there are lots of ways to achieve the same thing).

I hope you find these helpful and if there are ever any requests or questions, please don't hesitate to ask. I try to answer everything that comes my way!


Comment