Well, the best laid plans...I said I would really try to do a Before and After every Wednesday and then managed a whole...one. The problem was honestly that I forgot, plain and simple. It isn't a habit yet, so never occured to me again until I saw my old post that included the first one and realized I'd fallen off the wagon, so to speak. This is why New Year's resolutions never work for me. I literally forget I made them until, like April. So while I'm thinking about it, I'm doing one now (Monday night) and setting it to publish Wednesday a.m. Ha ha, I feel like I'm talking to the future.
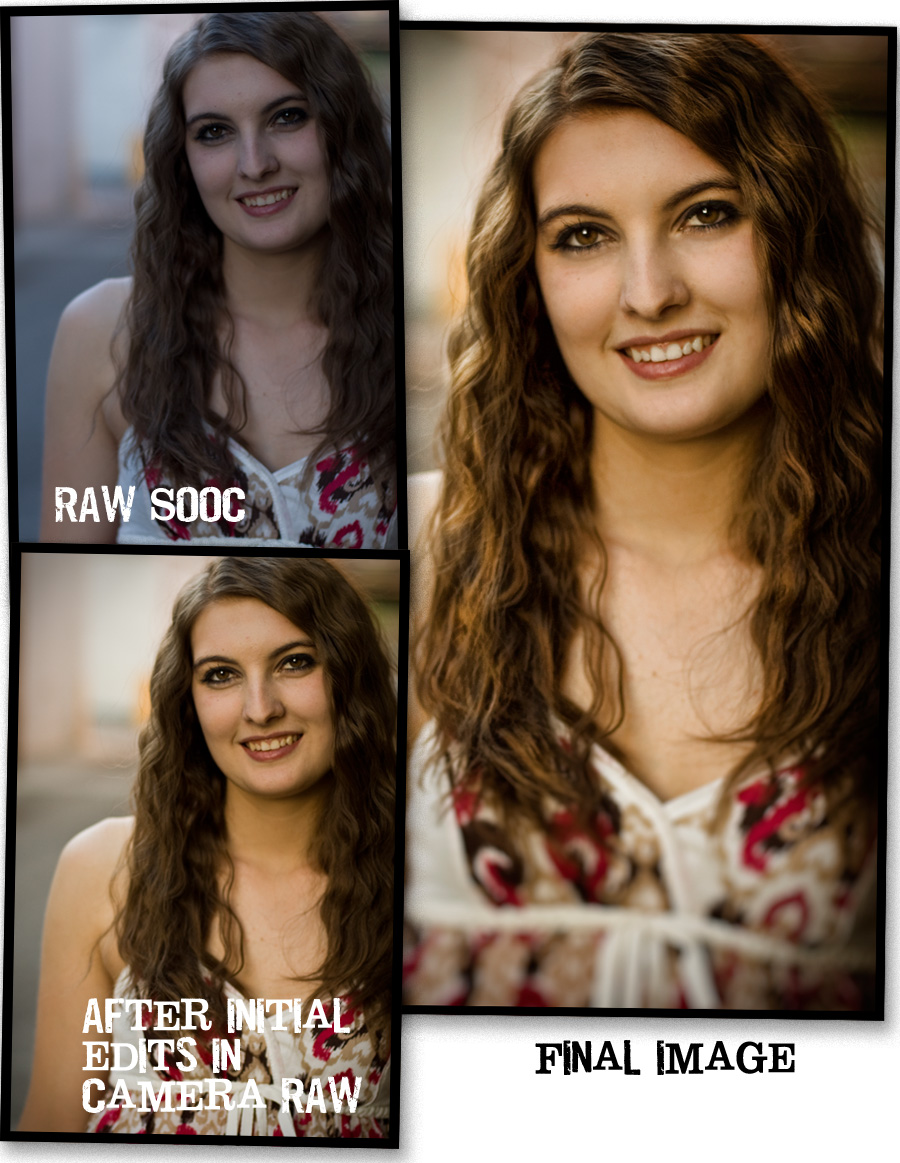
In this photo you can see the RAW SOOC version, exactly as it was captured. Below it is the RAW file with it's basic adjustments set in Camera RAW. I shoot everything in RAW with Auto white balance (except sports, where I shoot JPG with a custom white balance) because the beauty of RAW is being able to choose the best white balance in processing, fine-tuning as desired. So you really see the light's color difference between the two shots. Once opened in Photoshop, I really did very little. I added contrast to the different values in her hair (making some of the lights lighter and darks darker for contrast.) I also lightened what I'll call the "bags" under her eyes - although they aren't really bags, like dark circles or anything. It's common in a lot of young people, that fresh little pad of fat that defines the eye. I actually love it in real life, but when you photograph someone with dark eyes, like she has, it tends to close up the eye area making them appear like dark holes in the head. I lighten them (don't remove alltogether or it looks fake) and brighten up the eyes a bit for emphasis. I also added a subtle vignette and some selective bluring in the lower part of the photo to put more emphasis on her beautiful face. A couple small blemishes were sampled out and the whole process took just a couple minutes.